

by Home Fries
Digital Image Design (DID) made its classic games (to which this wiki is dedicated) between 1996 and 1998. During this time, Windows 95/98 was the standard consumer Operating System (OS). Since Windows 95/98 operated with a 16 bit kernel (in order to ensure backwards compatibility with DOS), DID's installers are 16 bit as well. Unfortunately, the latest Windows 64 bit operating systems have dropped 16 bit backward compatibility, and as a result you cannot natively use 16 bit programs or installers in Windows x64. This even applies to EF2000 v2, which uses a 16 bit Windows installer despite being primarily a DOS program.
The purpose of this article is to provide alternatives for installing classic DID sims on a 64 bit operating system. While this article applies equally to EF2000 v2, ADF, and TAW, EF2000 will be used as the primary example.
Installation Options
The DID installers are 16 bit programs, so they are incompatible with a 64 bit OS. However, none of the DID installers write anything important to the registry, so 64 bit users have three options available:
- With a dual boot system, load your 32 bit OS and perform a full install there. If you run EF2000 for Windows 95, you will likely want todo so on your 32 bit OS anyway.
- If your system is not dual boot, but you have a 32 bit OS available (e.g. Windows XP, Windows 7 x86), perform a full install of EF2000 to your 32 bit PC. You may then zip your EF2000 folder (be sure to check the option for recursive subfolders) and unzip the archive to your 64 bit system. Likewise, you could burn the folder to a CD-R and transfer it to your 64 bit system if the two PCs aren't networked.
- If you do not have a 32 bit OS available to you, but you have Windows 7/8 Professional, Ultimate, or Enterprise, then you can download Windows XP Mode. This will install a version of Microsoft Virtual PC with a Windows XP partition as the primary drive.
Since options 1 and 2 are system dependent and simple to execute, the focus of this article will be on setting up Windows XP Mode.
Windows XP Mode (Microsoft Virtual PC) for Windows 7/8
MS Virtual PC sets up a virtual hard drive and runs a virtual Windows XP session from within your Windows 7/8 session.

EF2000 V2.0 How to install the CD on Windows 7 using Virtual PC
Video by CommanderT
CommanderT submitted an outstanding YouTube video that explains step by step how to install the CD of EF2000 to a 64 bit operating system using Virtual PC. He provides links so that you can do this even if you don't have the Professional Edition of Windows 7/8.
Installing Windows XP Mode
In order to install Windows XP Mode, you must have at least the Professional Edition of Windows 7 or later. As long as you meet eligibility criteria, you can download Windows XP Mode for free from the Microsoft Website. I highly recommend using Internet Explorer to download the file; despite the FAQ on the Microsoft site saying that the validation software will run as an executable with other browsers, I was unsuccessful until I used the ActiveX controls native to Internet Explorer. Once your copy of Windows is validated, you will be prompted to install one of two versions of Windows XP Mode. The version with "N" in the file name (e.g. WindowsXPMode_N_*.exe) does not include Windows Media Player; this is the only difference between the installs. Most people pefer the version that doesn't have "N" in the filename.
Here are Microsoft's instructions on how to install and run Windows XP Mode. Once you follow these, you should have a running virtual session of Windows XP. Windows XP Mode will default to a virtual system drive (C:), and a CD/DVD drive (D:, which will correspond to one of your physical CD/DVD drives). If you need to change these settings prior to installing your DID game, then use the "Settings" option in the "Tools" pulldown menu to make the appropriate changes. I recommend keeping Integration Features enabled (also in the Tools menu). The rest of the article will assume D: as the CD/DVD drive.
Installing your DID Software
You can either put your DID CD-ROM in the physical drive, or you can map the virtual CD drive to an ISO image. You can configure your desired CD-ROM solution selecting "Settings" from the "Tools" pulldown menu. Either way, you will want to navigate to your D: drive.

EF2000 CD mounted to Virtual D drive
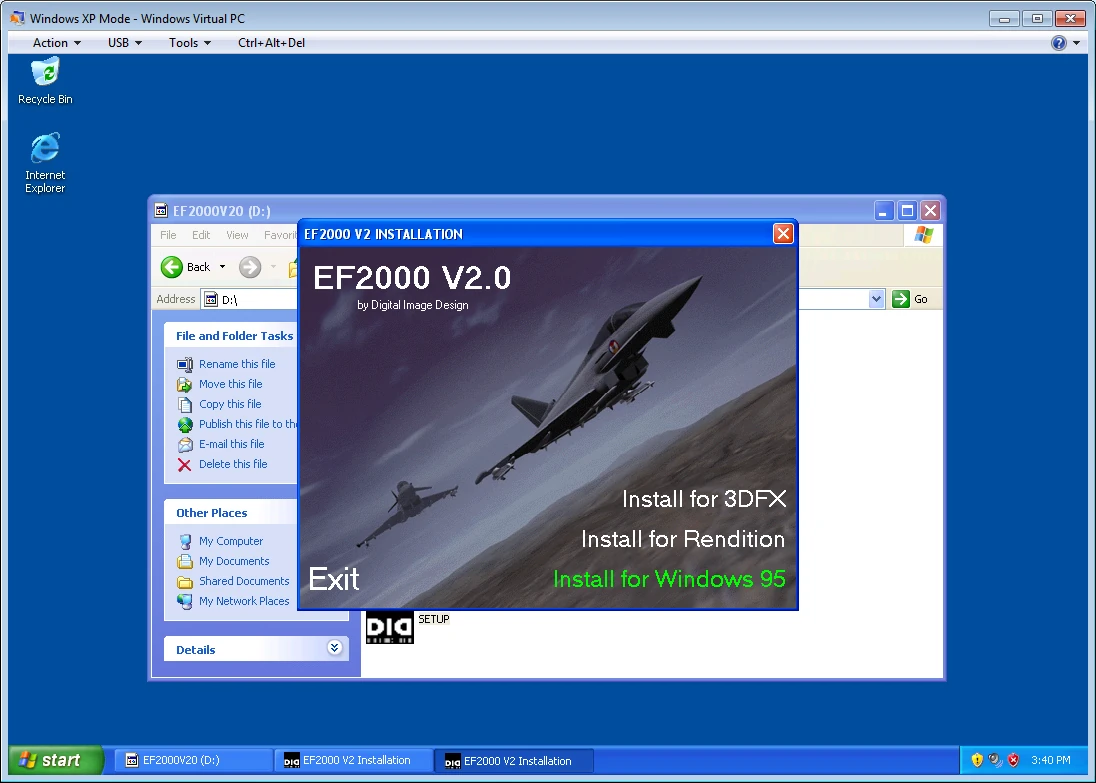
From there, run SETUP.EXE (the DID icon). You will get the Autorun screen. In this example, we will install EF2000 v2.0 for 3DFX.
The Autorun menu for EF2000 v2.0
Select the EF2000 v2.0 for 3DFX option on the Autorun screen, and the installer will start. When you get to the screen where you choose the Destination Location, you will want to choose a folder on the C drive. This is because while you have "network" access to your Windows 7/8 drives, the installer does not recognize them. Therefore, you must install to the C drive for now.
The default path for EF2000 v2.0 for 3DFX is
C:\Program Files\Digital Image Design\EF2000 V2.0 for 3DFX
This is fine for now. In fact, you may wish to install the EF2000 for Windows 95, or F-22 ADF, RSO, and TAW as well. Of course, you won't be running from the virtual folder in Windows 7/8, but this doesn't matter because no meaningful registry entries are made on installation.
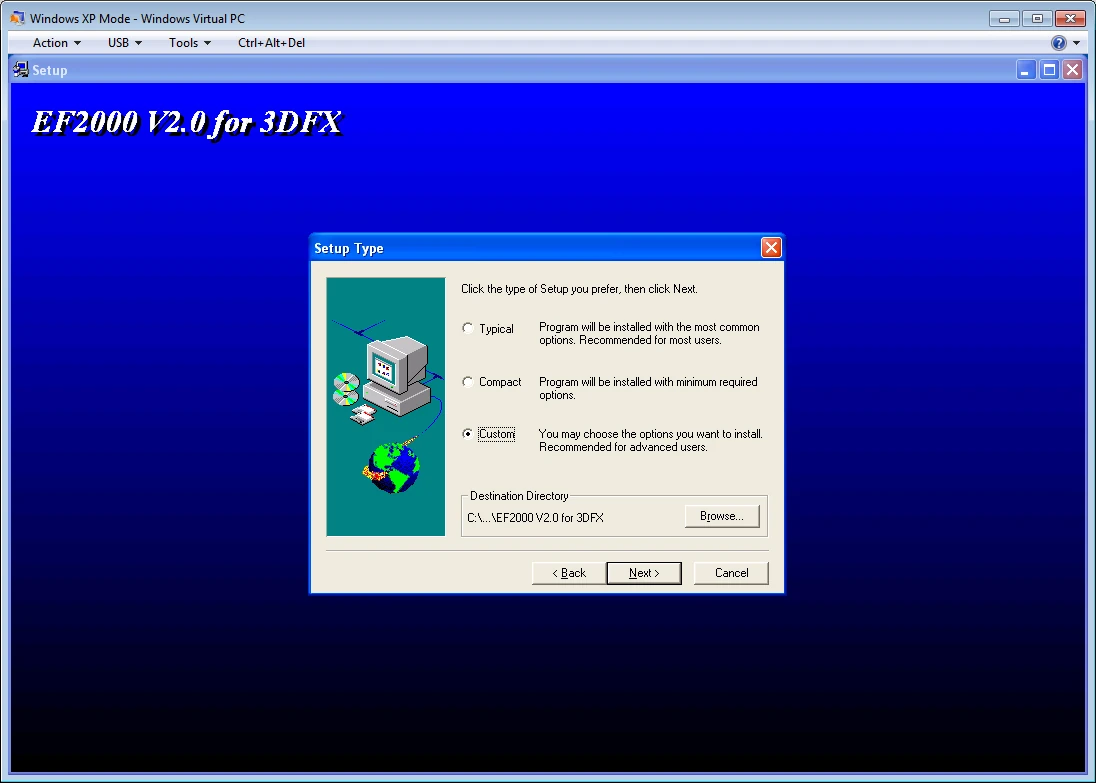
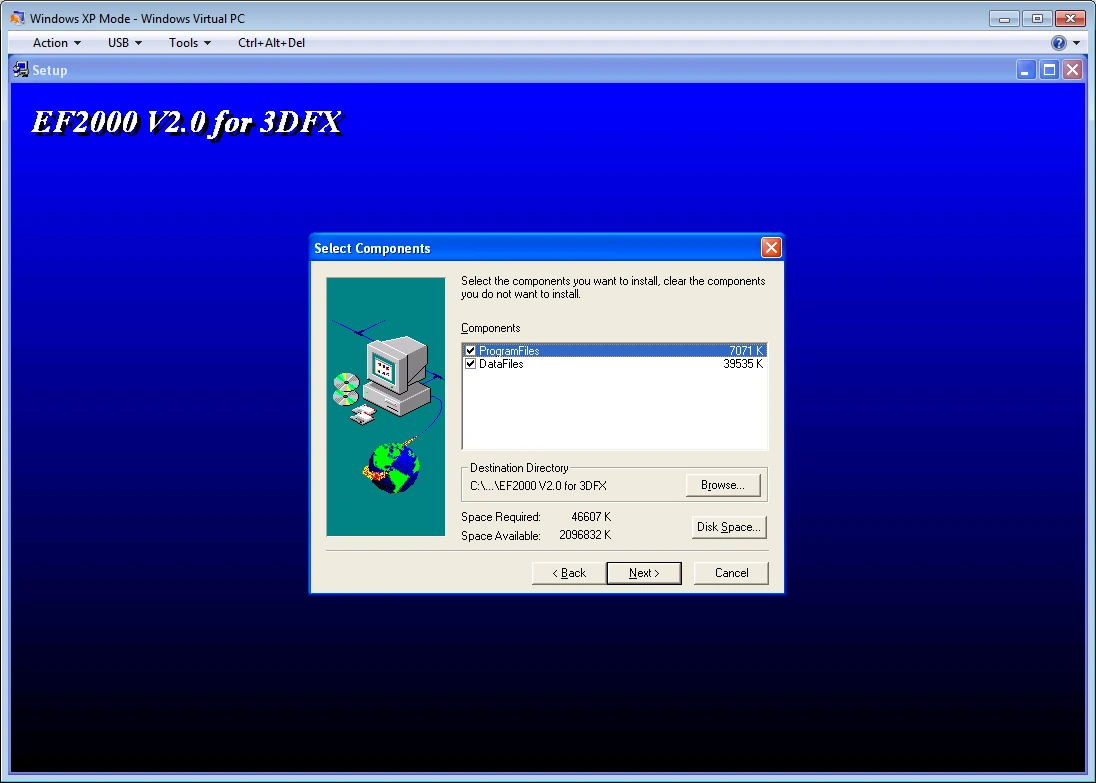
When prompted, select Custom install and select everything.
Select Custom Install...
...then select all options.
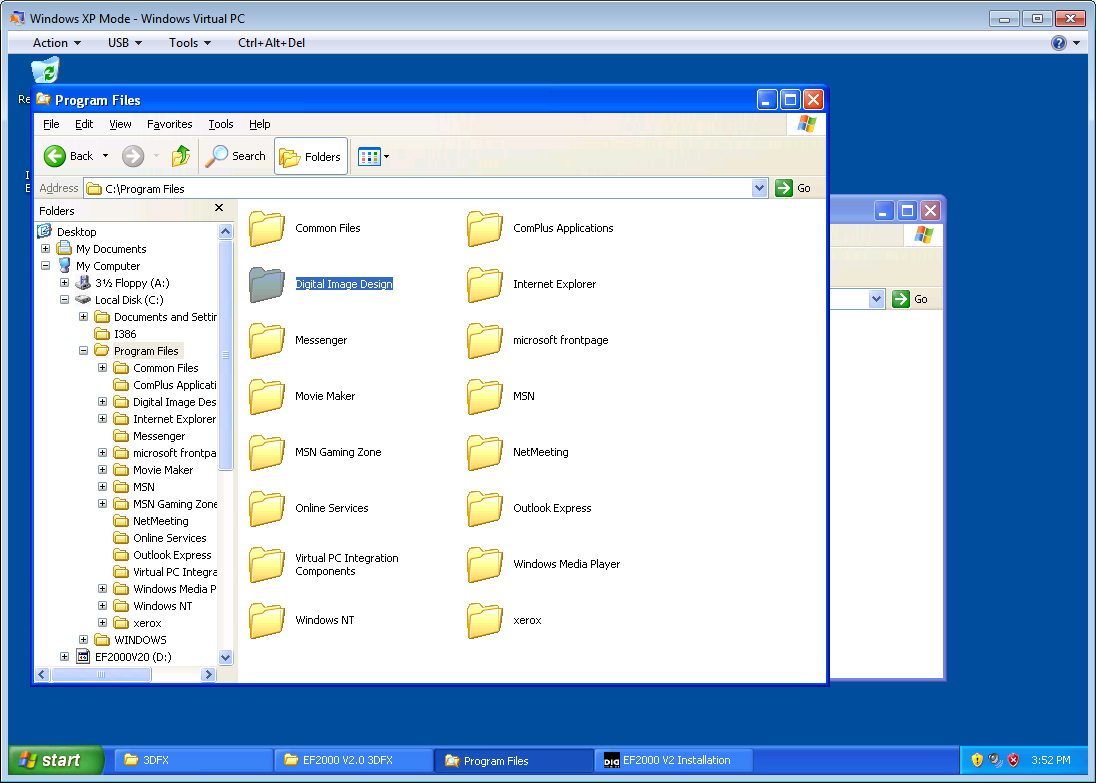
Once install is complete, the easy part begins. Now you will just copy your "Digital Image Design" folder from the C drive to the drive of your choice. You can manually copy folders from your virtual drive to your "network" drives that are actually the physical drives on your PC, just like the following diagram. Just make sure you don't copy to c:\Program Files or c:\Program Files (x86), as these programs will not work properly in these protected folders on Windows Vista and later.
Find the Digital Image Design folder on your virtual C drive.
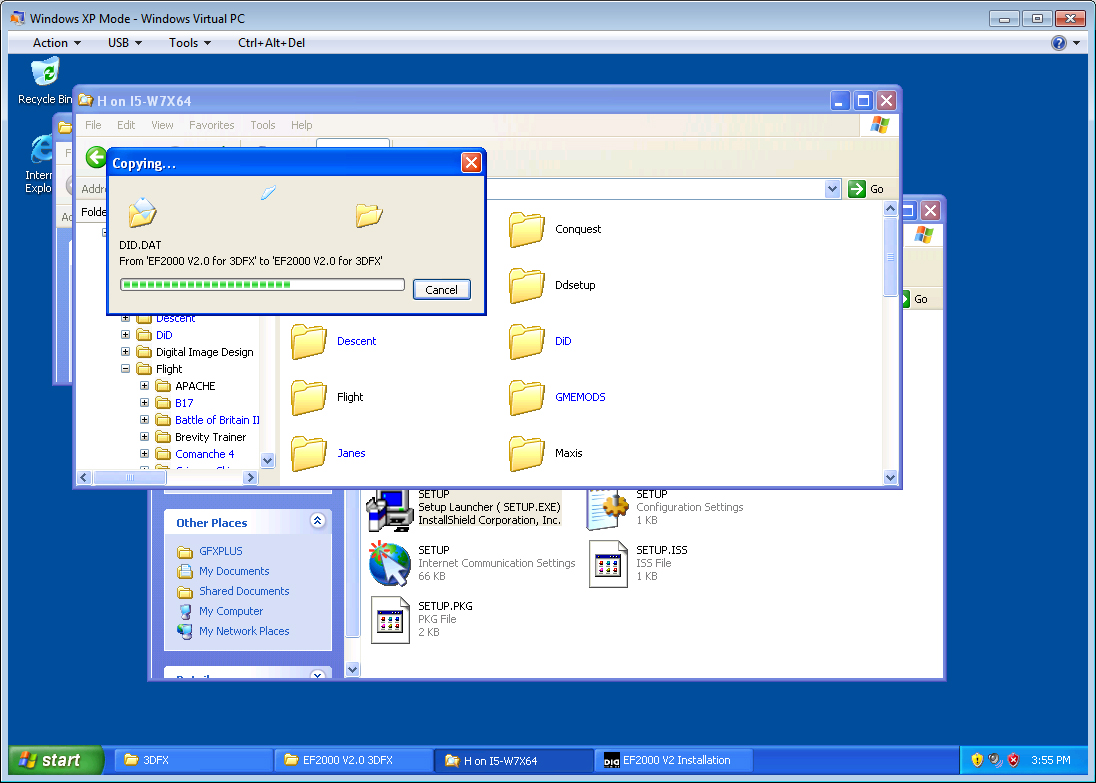
Copy the Digital Image Design folder from the Virtual C drive to the "networked" physical drive.
Once your files are here, you can close your Virtual Windows XP session. Click on the Ctrl+Alt+Del button on the top of the Virtual PC window and select Shut Down.
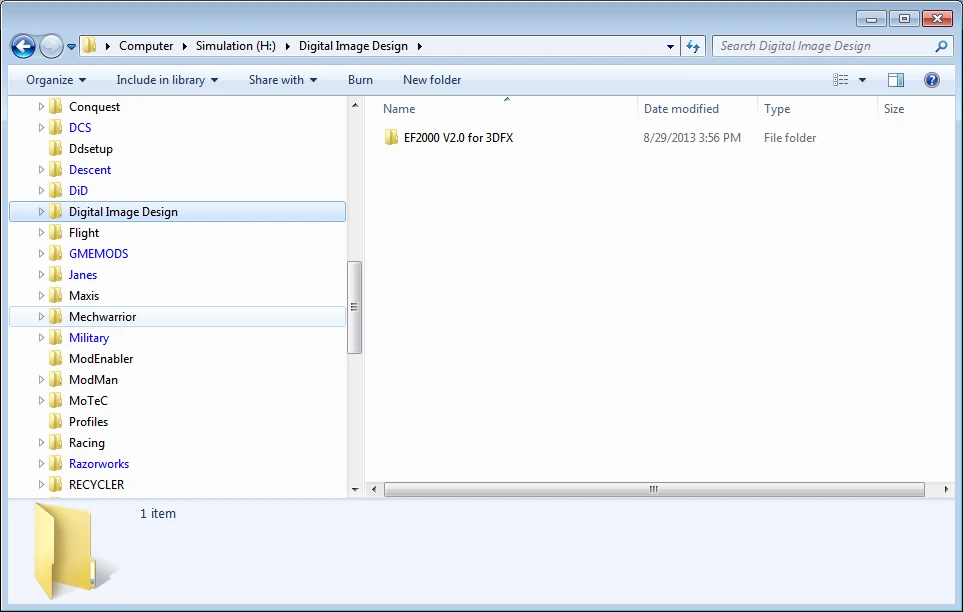
Your files are now accessible in Windows 7/8
Congratulations. Your DID files are now resident and available on your Windows 7/8 system. You should not need to create shortcuts if you are using DOSBox, but you will want to create a shortcut to superw.exe if you are running EF2000 for Windows 95.
Windows 10 Alternatives
Since Windows 10 does not support Virtual XP mode, alternatives are required. The following alternatives are submitted by others, and not personally tested by the author.
Virtual Unbuntu
- download Oracle VirtualBox
- install any Unbuntu distro
- install wine
- run the DID installer using wine
- copy the files to a USB stick
- copy the files to your win10 install
For the Super EF2000 win95 version there are a couple of extra steps required:
- copy 'did.dat' from SEF2000 into 'Program'
- create a shortcut to _SUPERW.EXE with the 'target' set to :
"C:\Program Files\Digital Image Design\SEF2000\PROGRAM\_SUPERW.EXE" DID=. quick_flag=1 GUI
This resolve issues with 'No data found, check CD is inserted' messages.