

by Home Fries
One frustration with ADF and TAW has always been that you cannot lock up a target with your LANTIRN in SLAVED tracking mode while GBU-24 Laser Guided Bombs (LGBs) are selected. If you have the GBU-24 selected, you are unable to create a target list, and any target list created when another weapon is selected (e.g. Cannon) is not carried over when GBU-24s are selected. Likewise, if you are close enough to a unitary target (e.g. SAM/AAA site, Tank, aircraft) to bring it up by free-tracking, you are likely well within its engagement envelope. Either way, an airborne predator carrying 2000lb bombs becomes a sitting duck to a SAM or AAA site.
Until now.
Executing the Procedure
While the GBU-24 only works if the LANTIRN is in FREE tracking mode, the other Air to Ground (AG) weapons work with the targeting system in FREE or SLAVED tracking mode. Use this to your advantage. If you wish to engage a unitary target with your LGB, you can lock it up with another weapon selected, then hand its location off to the GBU-24 by locking the target and switching to FREE tracking mode.
For purposes of this article, the term "Unitary Target" (also commonly referred to as "Point Target") refers to a single entity (e.g. tank, SAM, AAA, boat, parked aircraft) that can be selected to a target list and automatically slewed to LANTIRN in SLAVED mode.
The following sections illustrate how to employ the GBU-24 against a unitary target.
Set-Up
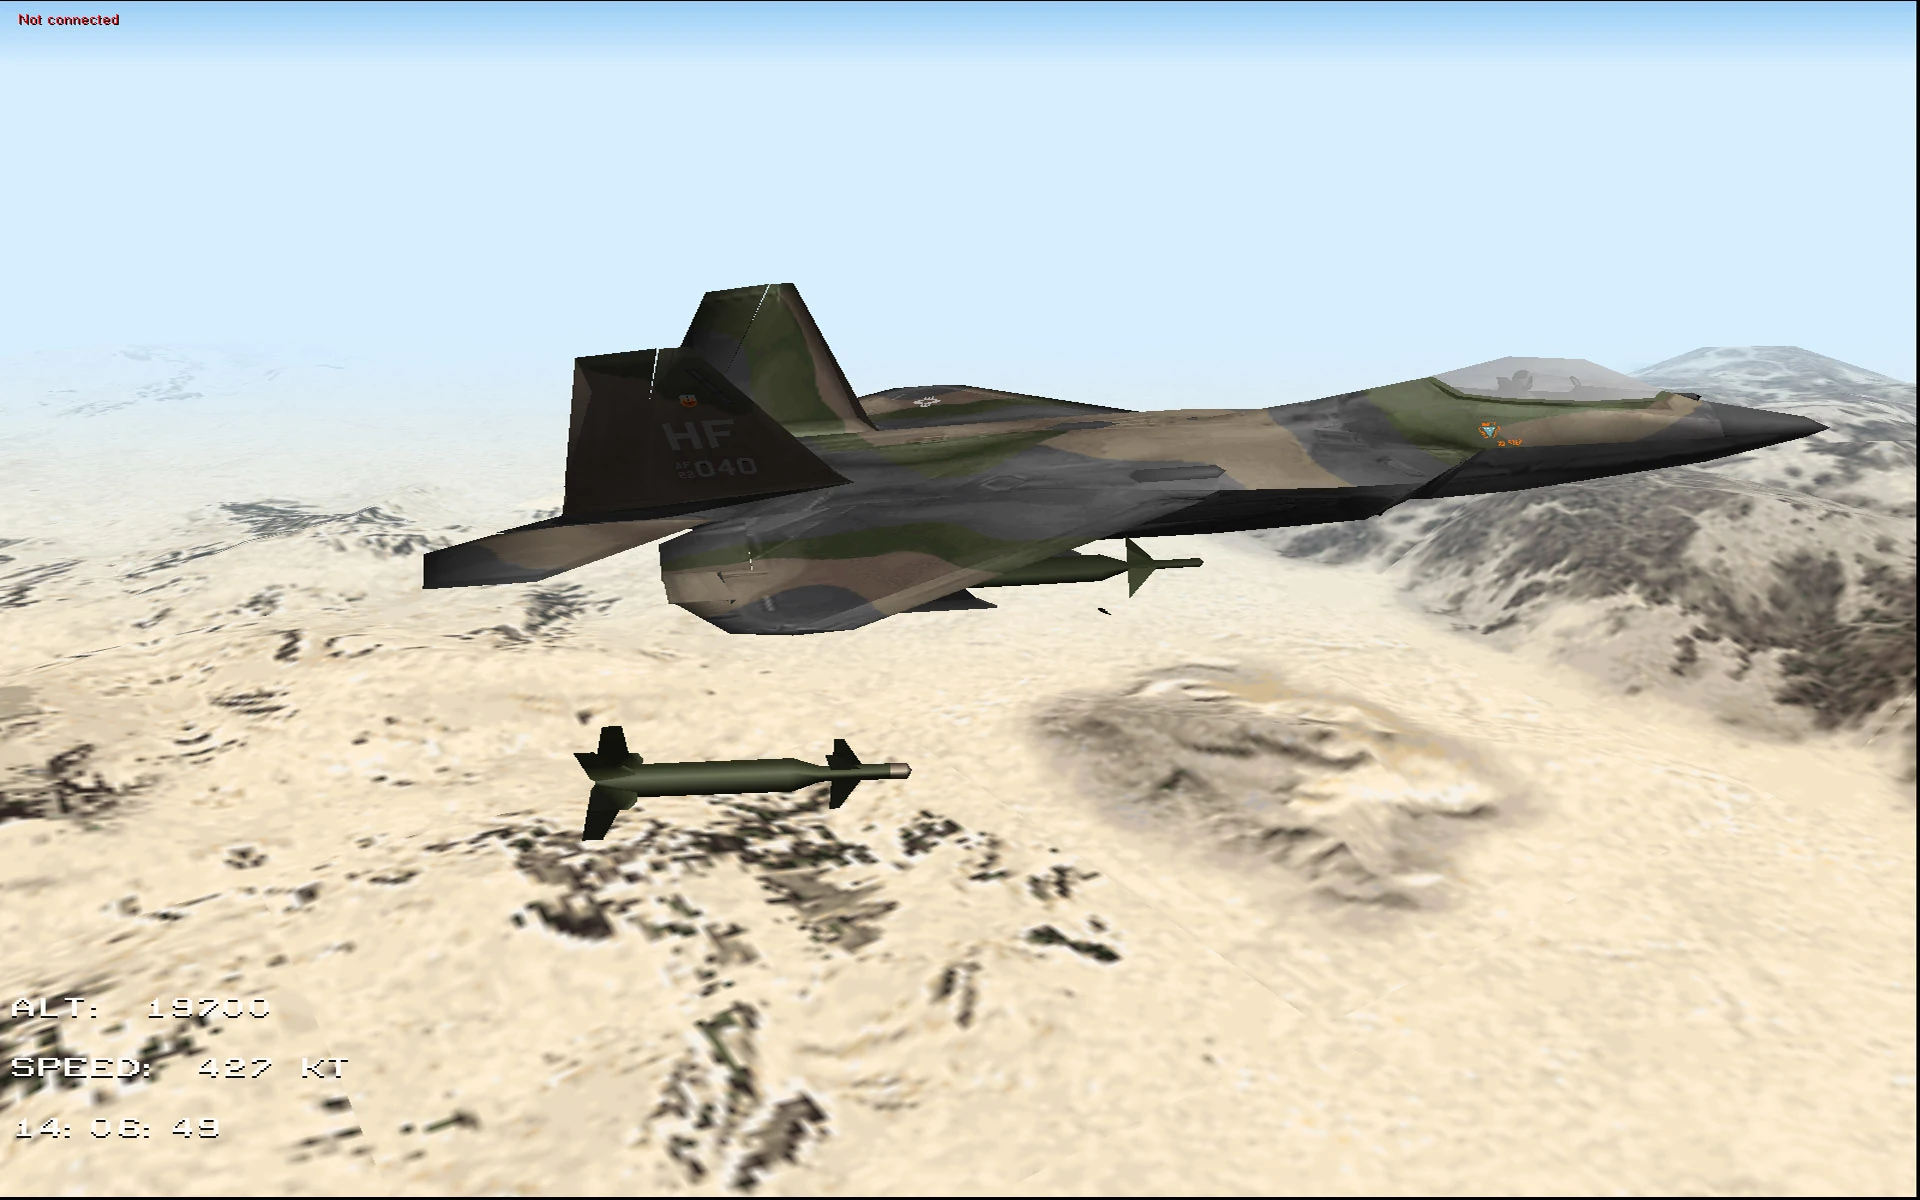
Most tactics work best if you are aware of the threat before you enter its engagement zone. This is especially true with this procedure, due to its labor-intensive steps and the lengthy in-flight time of the GBU-24. Therefore, the ideal first step is to detect your threat early enough to plan your engagement strategy.
In this case, we notice our SA-11 threat a little over 20 miles out. This isn't ideal, but is still early enough for us to retain the initiative.

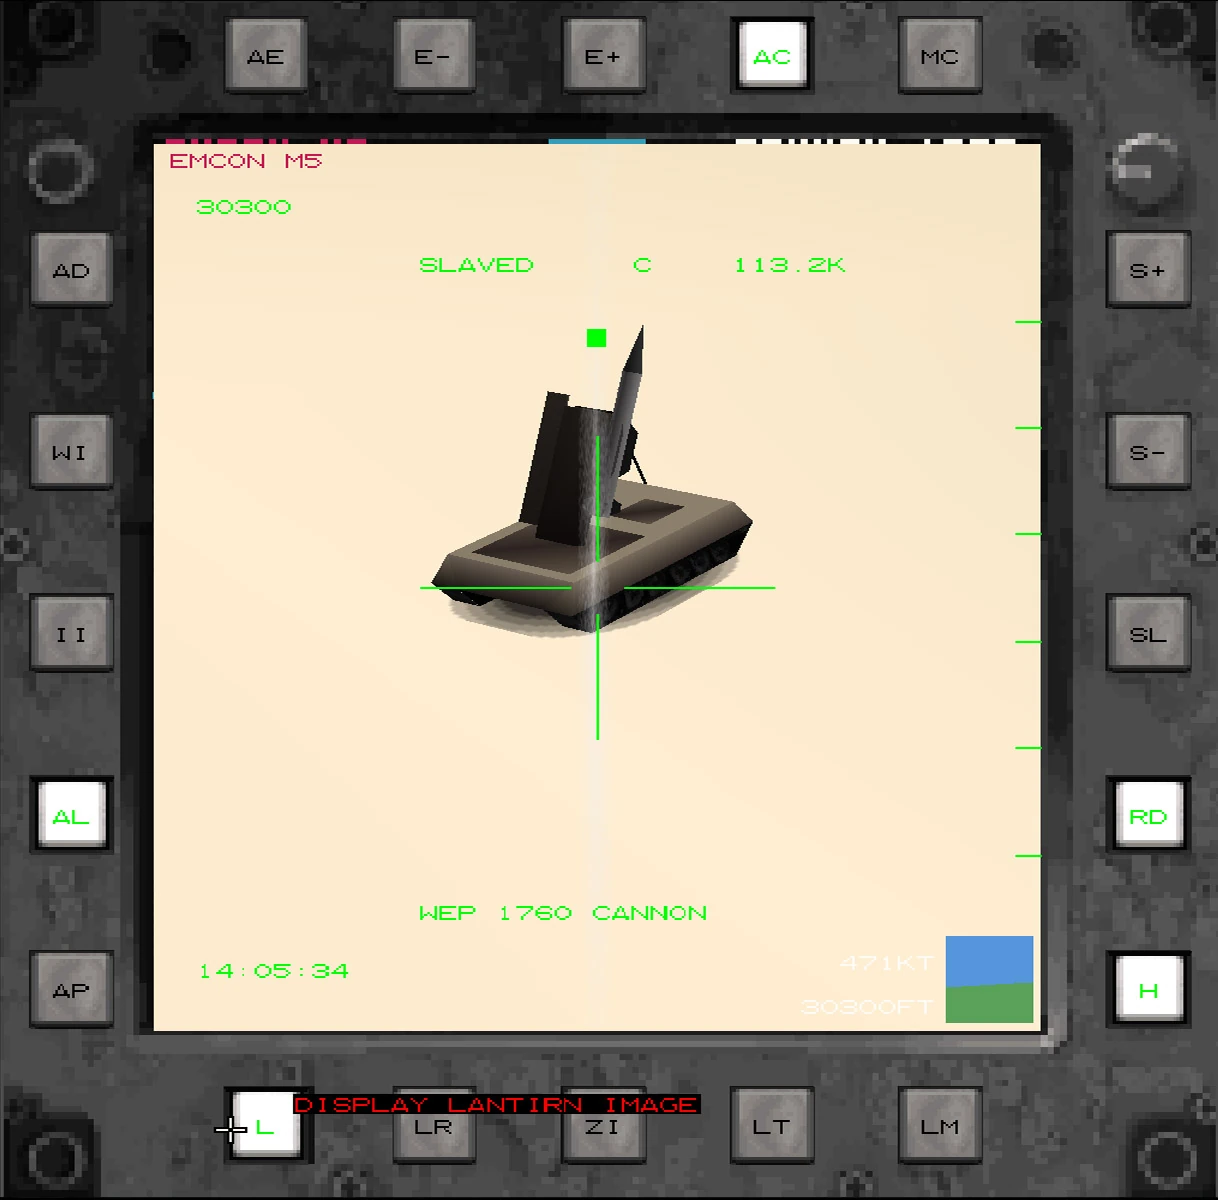
The first thing we want to do is set up our Attack MFD. Set the screen to LANTIRN, set the LANTIRN mode to SLAVED, and click the LANTIRN Reset button just to ensure that there are no surprises.
Next, we want to select a weapon other than the GBU-24. Any weapon that will let you create a target list will suffice, but we will use the Cannon for this example. The Cannon works well because an inadvertent discharge is unlikely to waste a critical weapon, and because if you're interested in employing a LGB on a unitary target, you probably don't have any other weapon for the job in the first place!
Finally, create your target list by pressing the "T" key and cycle through the targets until you see the target you wish to engage with the GBU-24.

Passing the Unitary Target off to the GBU-24
Now that you have the target slaved to the LANTIRN, you will want to somehow pass it to the GBU-24. However, since the GBU-24 cannot operate with the LANTIRN in SLAVED mode, you must take some intermediate steps to pass off the target.
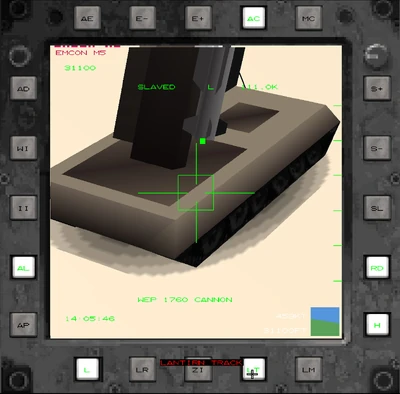
While you have the target slewed onto the LANTIRN in SLAVED mode, your first order of business is to click the "LT" button on the bottom row of the Attack MFD. This selects the LANTIRN Track function, which locks the LANTIRN into focusing on the location of that target. You will know that you are tracking when the "LT" button is illuminated and there is a square within the LANTIRN crosshairs.
In most cases, selecting LANTIRN Track will cause the view of the target to zoom in slightly. However, in some cases the view may in fact zoom out to the target location and the immediate surrounding area. This is not a malfunction of the tracking system. As long as you have the square within the crosshairs and you haven't manually adjusted the slew, you should still be locked onto your selected target.

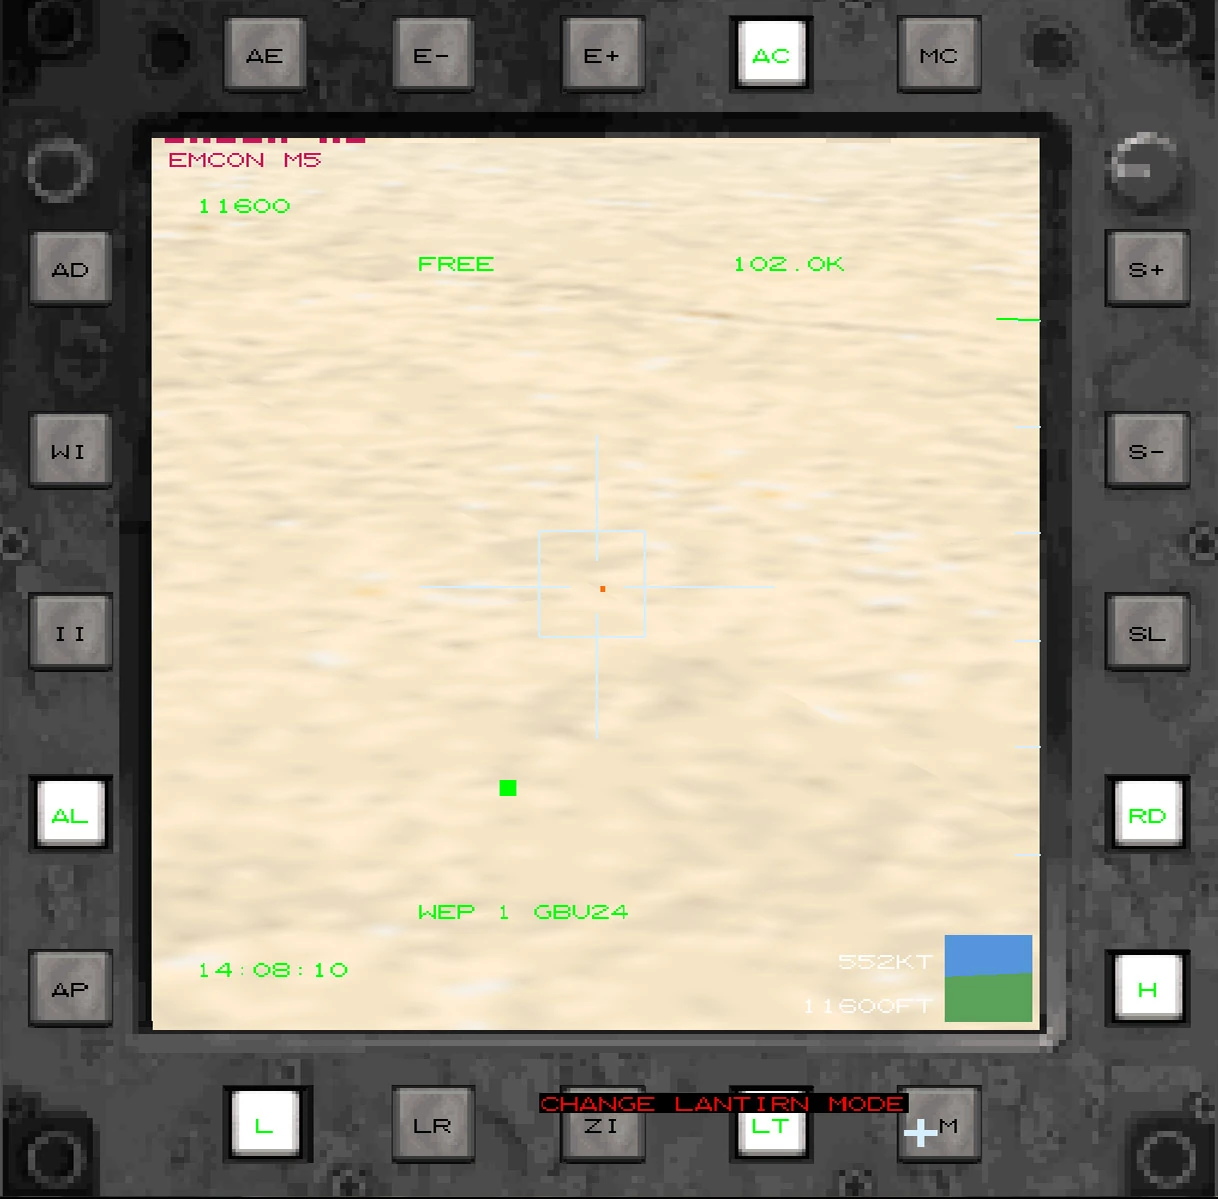
Now that you have selected LANTIRN Track, you need to change the LANTIRN mode from SLAVED to FREE. What this is essentially doing is freeing the LANTIRN from your integrated targeting system and keeping it boresighted on that position you locked up in the previous step. Fortunately for you, that ground position coincides with the location of your target! Your target will definitely disappear from the LANTIRN view at this point. This is merely a limitation of the graphics engine.
Note: since your target is too small to see in FREE mode, manually slewing or releasing LANTIRN Track at this point will ruin your targeting solution. If this happens, then you will need to revert to SLAVED mode, click LANTIRN Reset, LANTIRN Track the target again, then return to FREE mode.


FREE mode selected. You can't see the SA-11, but the missile trail (circled) tells you that you have the right spot!
Finally, you are ready to hand your target off to the GBU-24 LGB. Select the GBU-24, and at the target location you will see a solid triangle surrounded by a solid circle. This is your aimpoint for the GBU-24 (and where the LANTIRN is FREE tracking). If your solution is accurate, the triangle should superimpose itself over the pentagon shape of the anti-air threat.
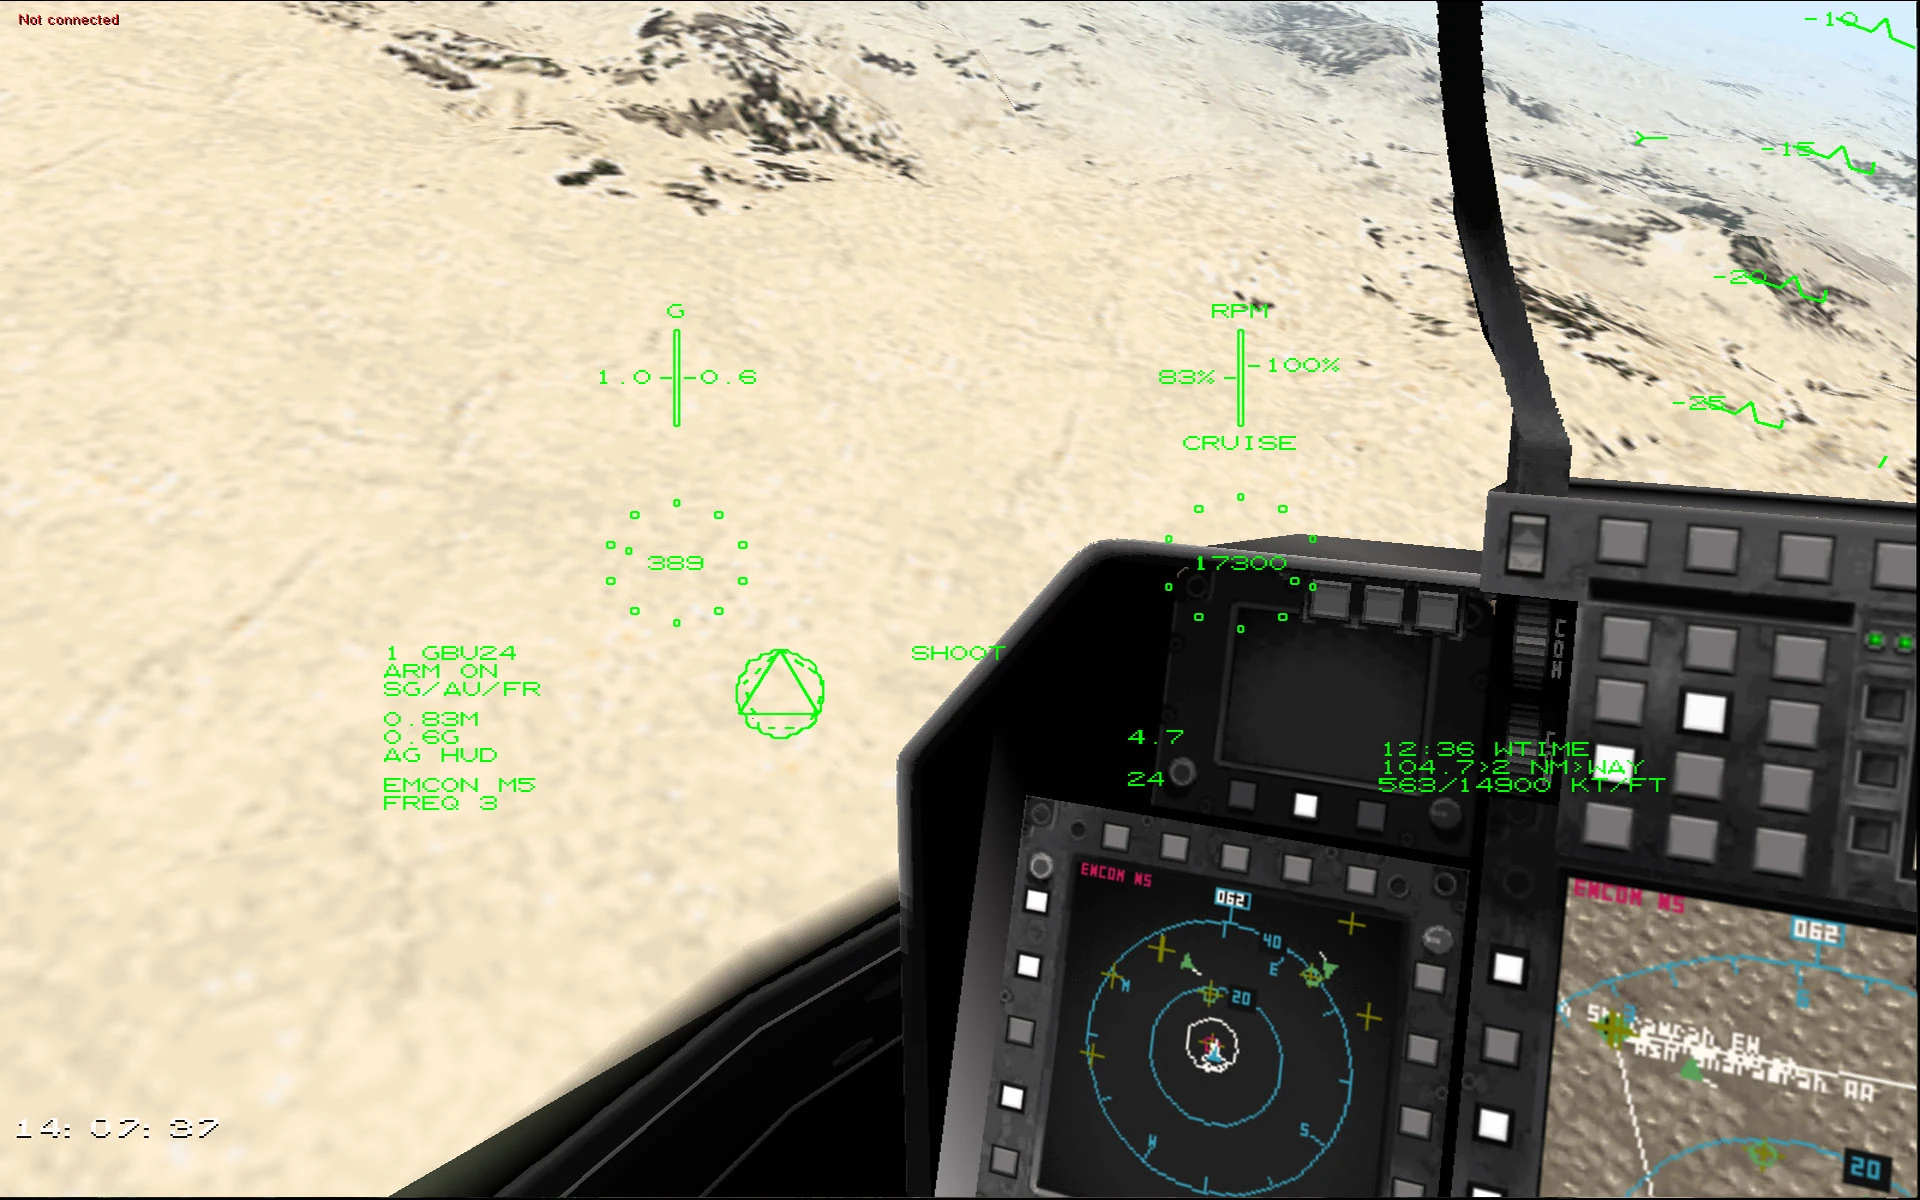
LANTIRN FREE mode targeting cue. Note that it is superimposed on the dashed pentagon shape of the anti-air threat.
Now For the Fun Part!
Now that you have the location of the unitary target locked and the GBU-24 selected, all that is left to do is get yourself into the GBU-24 employment envelope (i.e. firing range), be in at least EMCON 3, and release the weapon.
As a reward for all of that hard work, go ahead and select "WI" (Weapon Image) on the UFC display. You can then watch the LGB as it heads for its target.


You may notice in the LGB's terminal phase that the target slew is off by a few vehicle lengths. Not to worry; with 2000 pounds of Hate and Discontent on the way, a few vehicle lengths is close enough for government work!
Explanation
If you haven't guessed yet, what you are actually doing is finding your target in slave mode, locking the LANTIRN track, then switching to FREE tracking mode. This essentially forces the LANTIRN to track a point on the ground, but this point was originally designated by the LANTIRN view in SLAVED tracking mode. Therefore, you can engage in FREE tracking mode a target that was originally acquired in SLAVED tracking mode.
Checklist
This section is a "by the numbers" checklist of the steps necessary to duplicate the procedure illustrated above.
- Attack MFD - Set to LANTIRN
- LANTIRN Mode Select - SLAVED
- LANTIRN Reset - Press ("LR" button)
- HUD Mode Select - Air to Ground (AG)
- Weapon Select - Cannon
- Target List - Create
- Desired Target - Select
- LANTIRN Track - Select ("LT" button)
- Lock Symbology (Square in Crosshairs) - Confirm
- LANTIRN Mode Select - FREE
- Weapon Select - GBU-24
- GBU-24 Launch Parameters - Confirm "SHOOT" Cue
- EMCON - Set 3 (or Higher)
- Weapon - Release